Creating a HomeLab using VirtualBox is an excellent way to practice IT administration, networking, and cybersecurity. In this guide, I will walk you through setting up a Windows Server 2019 and a Windows 10 client, configuring Active Directory, and integrating the client into the domain.
Creating a HomeLab using VirtualBox is an excellent way to practice IT administration, networking, and cybersecurity. In this guide, I will walk you through setting up a Windows Server 2019 and a Windows 10 client, configuring Active Directory, and integrating the client into the domain.
Step 1: Download and Install VirtualBox
- Visit the VirtualBox website and download the latest version.
- Install VirtualBox by following the installation wizard.
Step 2: Download Windows Server 2019 Evaluation
- Download the Windows Server 2019 Evaluation ISO from Microsoft’s Evaluation Center.
Step 3: Create a Virtual Machine for Windows Server 2019
- Open VirtualBox and click on New.
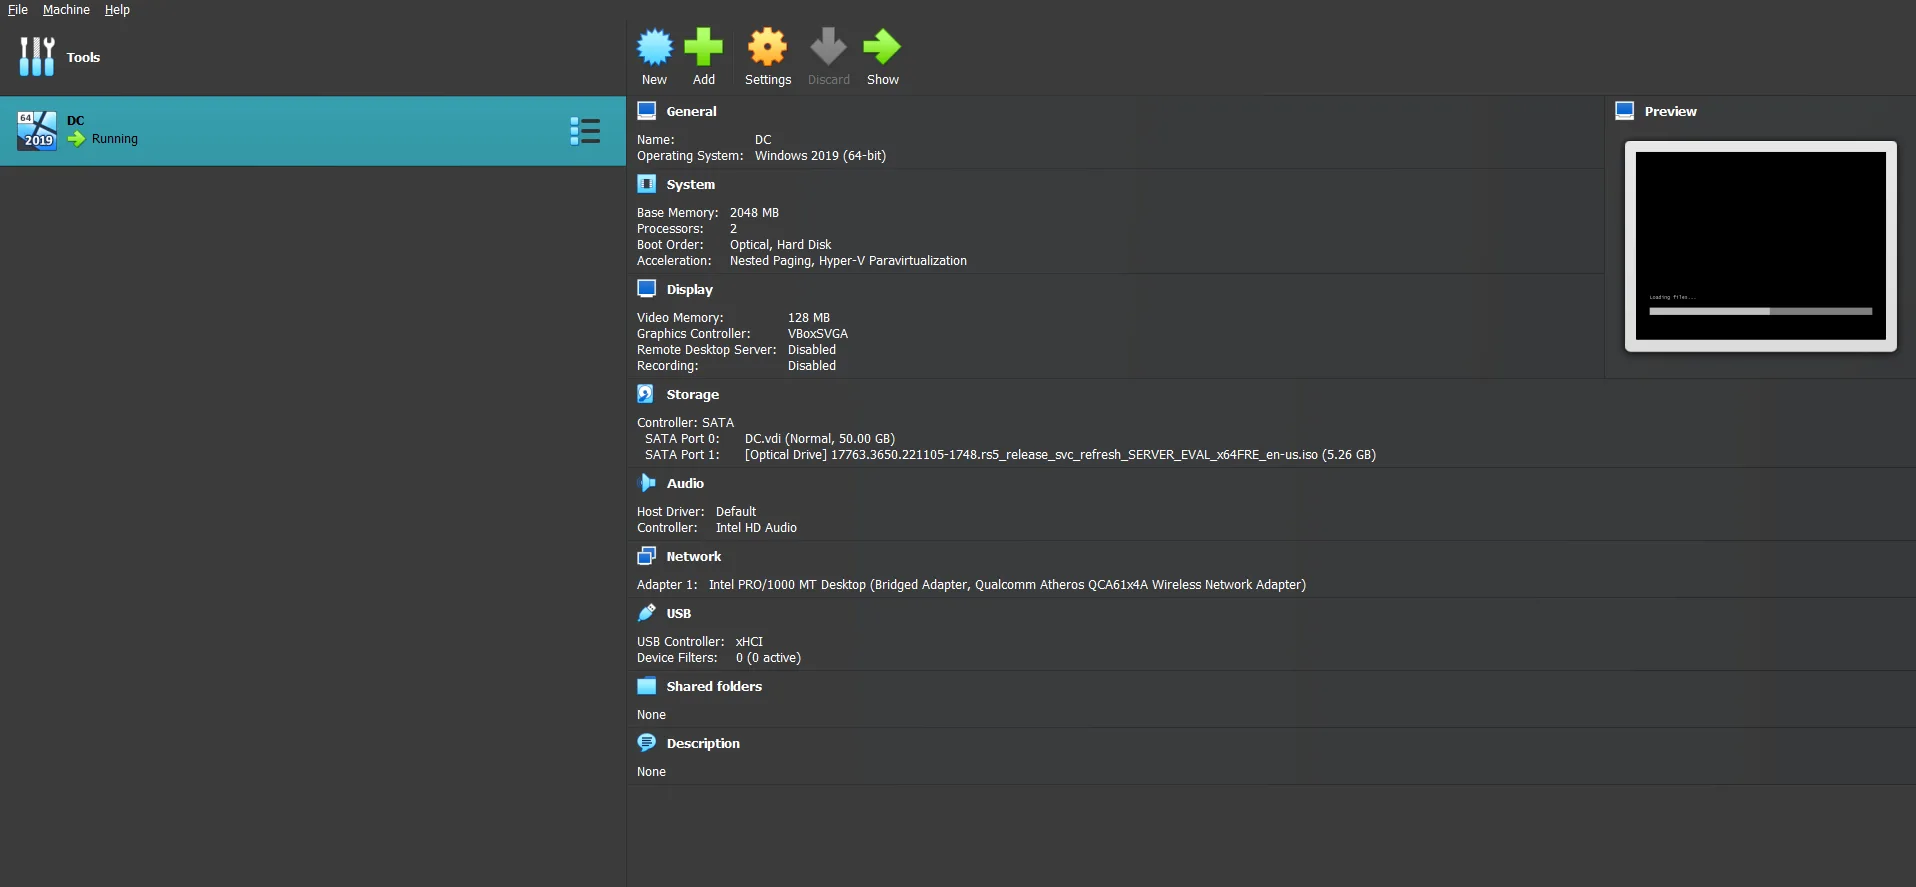
- Set a name for the VM, e.g., DC.
- Select Microsoft Windows as the type and Windows Server 2019 (64-bit) as the version.
- Attach the ISO file downloaded in Step 2.
- Check Skip Unattended Installation.
- Click Next.
Step 4: Adjust Hardware Configuration
- Assign 2GB RAM and 2 CPUs.
- Set a Virtual Hard Disk of 50GB (recommended best practice).
Step 5: Finalize Virtual Machine Setup
- Review the summary and click Finish.
- Go to Tools > System and uncheck Floppy from the boot order, ensuring Optical and Hard Disk are prioritized.
- Navigate to the Network tab and set Adapter Attached to Bridged Adapter (connects the VM to your router for IP assignment).
- Click OK.
Step 6: Install Windows Server 2019
- Start the VM and proceed with the Windows installation.
- Select Windows Server 2019 Datacenter Evaluation (Desktop Experience).
- Choose Custom Installation.
- Complete the installation process.
Step 7: Configure Windows Server 2019
- Set up a password for the administrator account.
- Right-click on Start > System.
- Rename the PC to match the server name chosen in Step 3.
- Restart the VM.
Step 8: Download and Set Up Windows 10 Evaluation VM
- Download Windows 10 Evaluation from Microsoft’s Evaluation Center.
- Create a new VM in VirtualBox, naming it Helpdesk.
- Attach the Windows 10 ISO.
- Skip Unattended Installation and click Next.
- Assign 2GB RAM, 2 CPUs, and 35GB Virtual Hard Disk.
- Start the VM and install Windows 10.
Step 9: Configure Windows 10
- Choose Domain Join Instead when setting up the user.
- Set Admin as the username, along with a password and security questions.
- Rename the PC to Helpdesk.
Step 10: Configure Active Directory on Windows Server 2019
- Start the DC VM.
- Open Server Manager > Manage > Add Roles and Features.
- Select Active Directory Domain Services.
- Click Next until you reach Confirmation, then click Install.
- Once installed, click Promote this Server to a Domain Controller.
- Choose Add a New Forest, setting the root domain as jobskillshare.org.
- Set NetBIOS domain name as JSS.
- Click Next through the installation process and let the server reboot.
Step 11: Verify Active Directory Installation
- Open Server Manager.
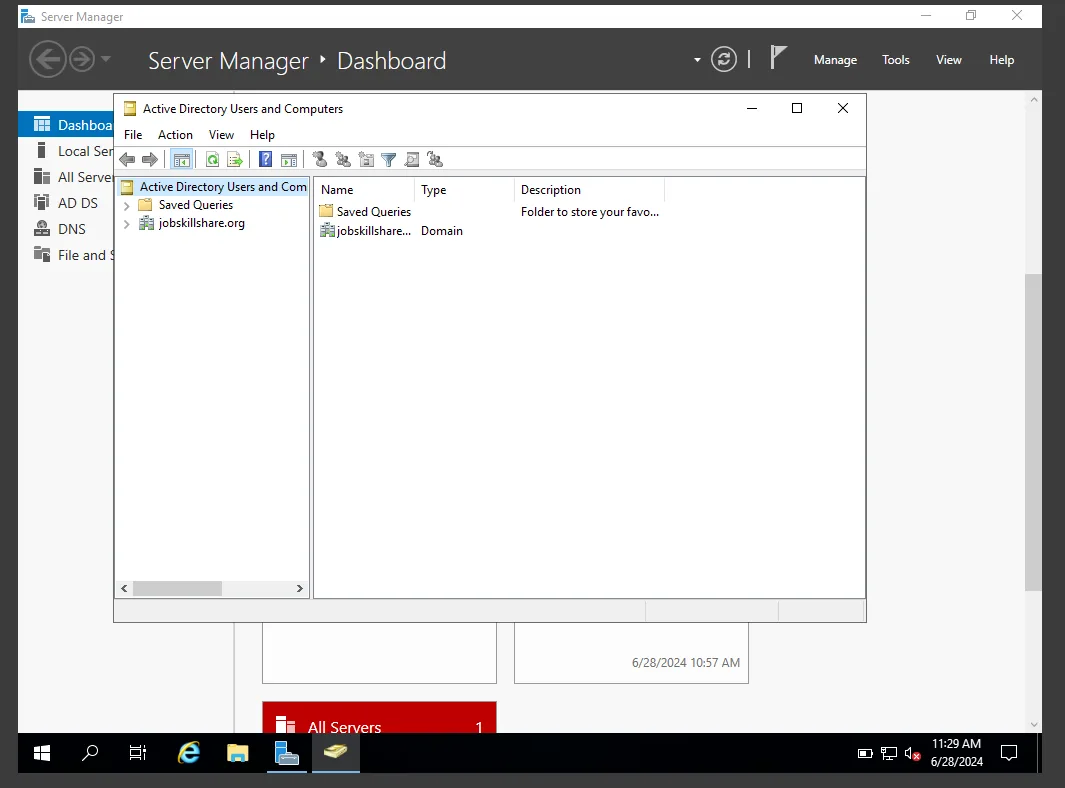
- Navigate to Tools > Active Directory Users and Computers.
- Verify that Active Directory is running.
Step 12: Add Windows 10 Helpdesk Machine to the Active Directory
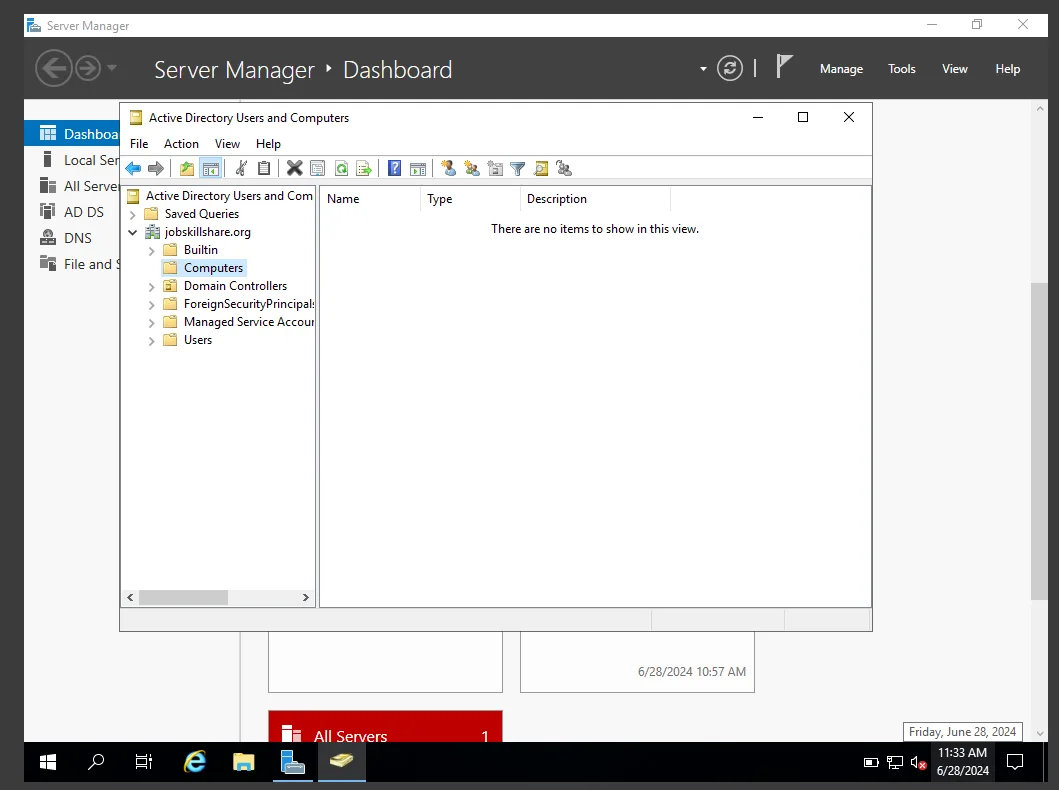
- Open Active Directory Users and Computers.
- Check the Computers section (should be empty).
- On the Helpdesk machine:
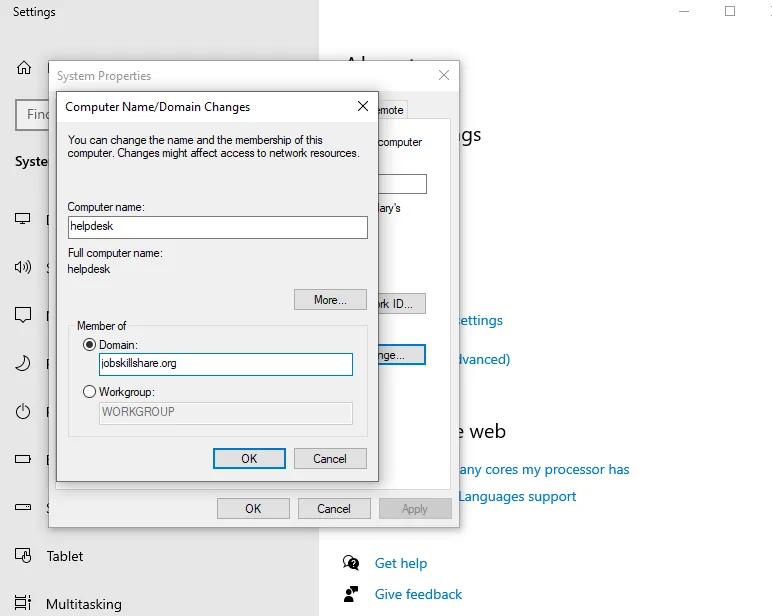
- Open System Properties.
- Click Change.
- Select Domain and enter jobskillshare.org.
- Open Command Prompt on the Server and type:
ipconfig /all- Note the IPv4 Address.
- On Helpdesk, go to Network & Internet > Change Adapter Options.
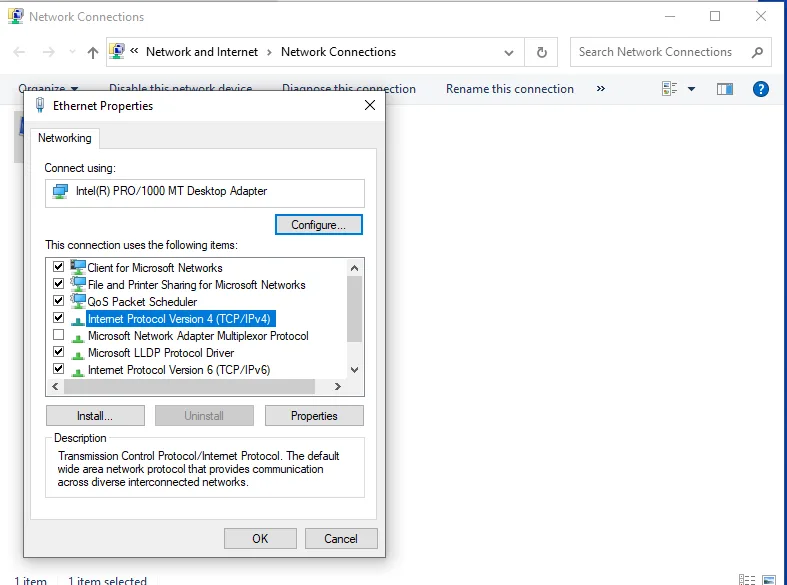
- Open Ethernet Properties > IPv4 Properties and set the DNS server to the Domain Controller’s IP Address.

- Restart the machine.
Step 13: Create an Active Directory User
- Open Active Directory Users and Computers.
- Right-click on Users > New > User.
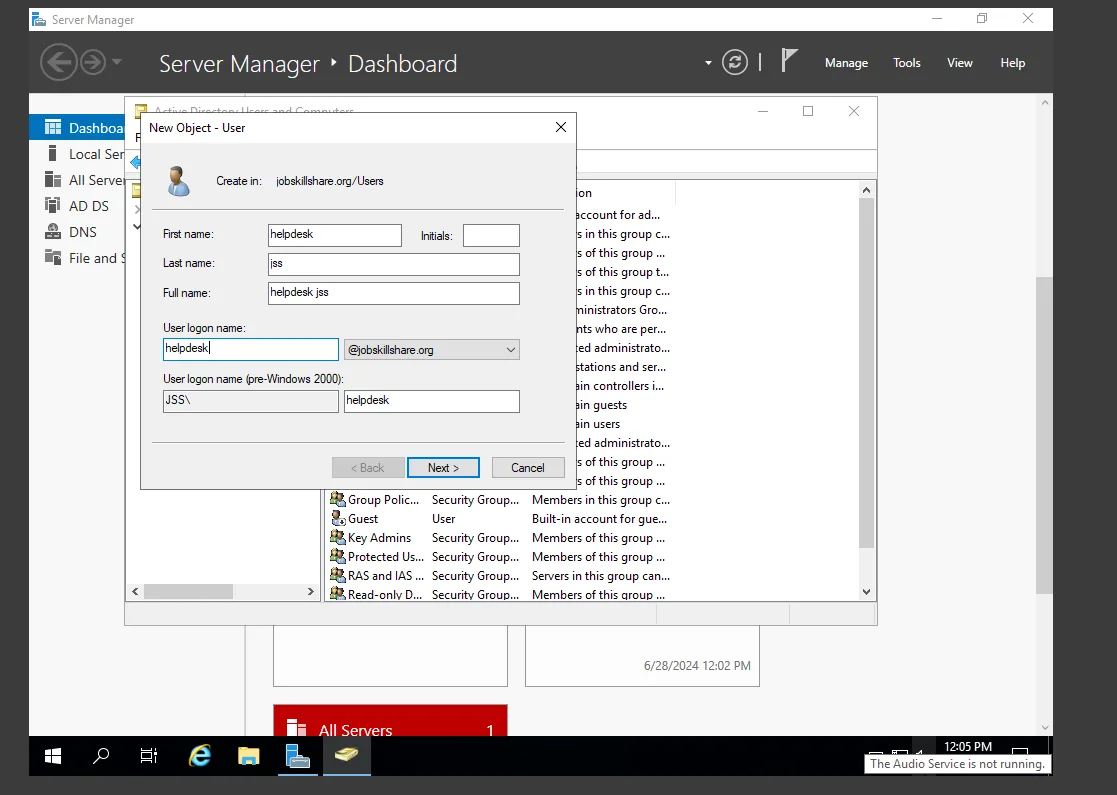
- Enter details and set a password.
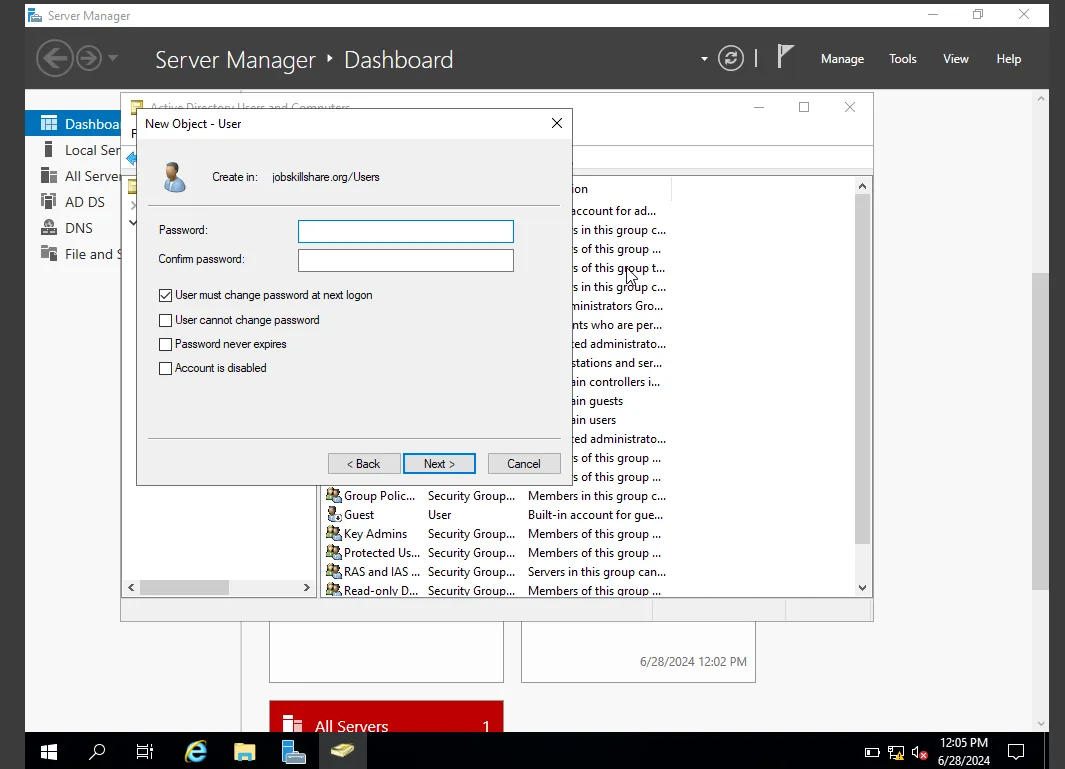
- Uncheck User must change password at next logon.
- Right-click on the new user > Properties > Member Of > Add > Domain Admins.
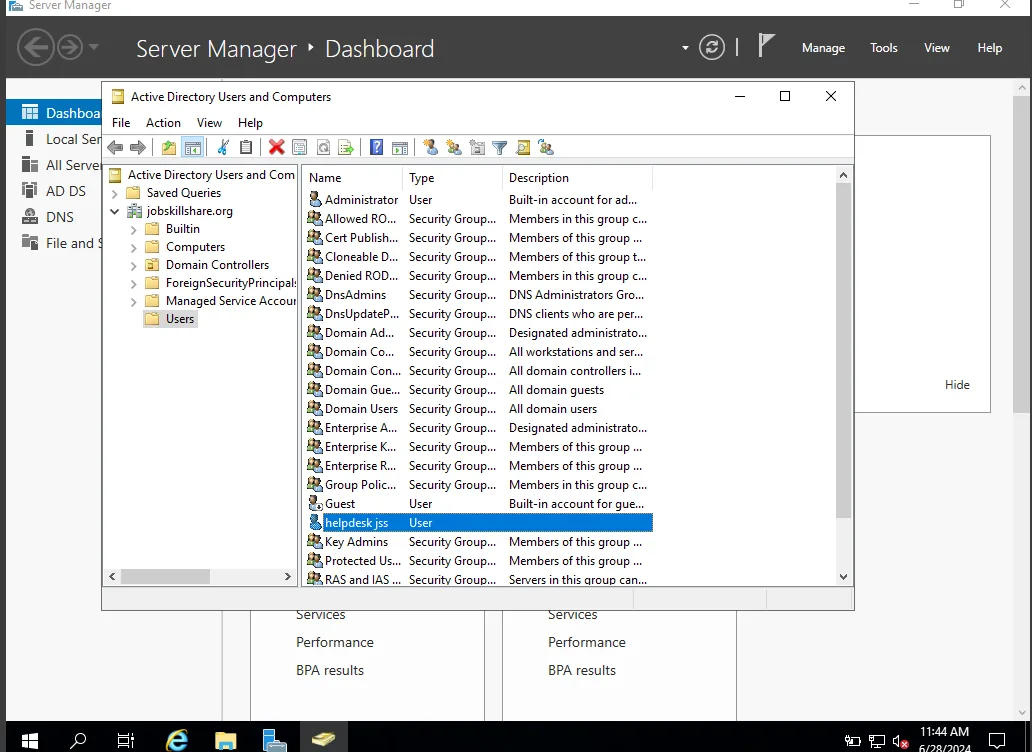

Step 14: Verify Domain Connectivity
- Restart Helpdesk VM.
- Log in using the Active Directory credentials.
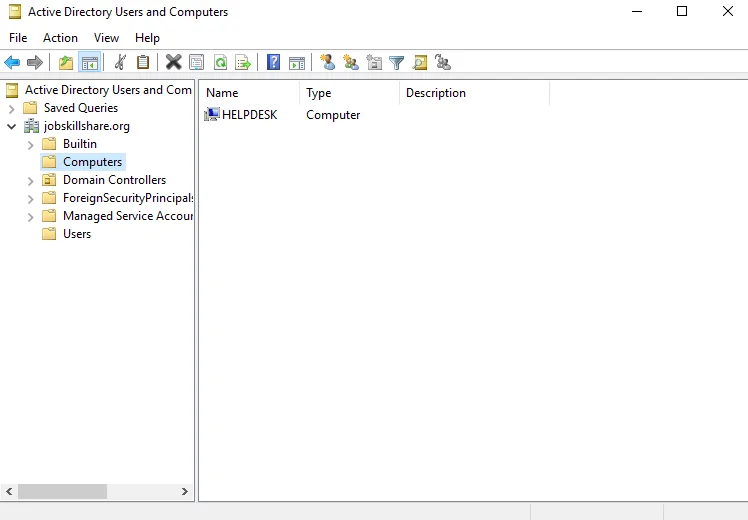
- Open Active Directory Users and Computers.
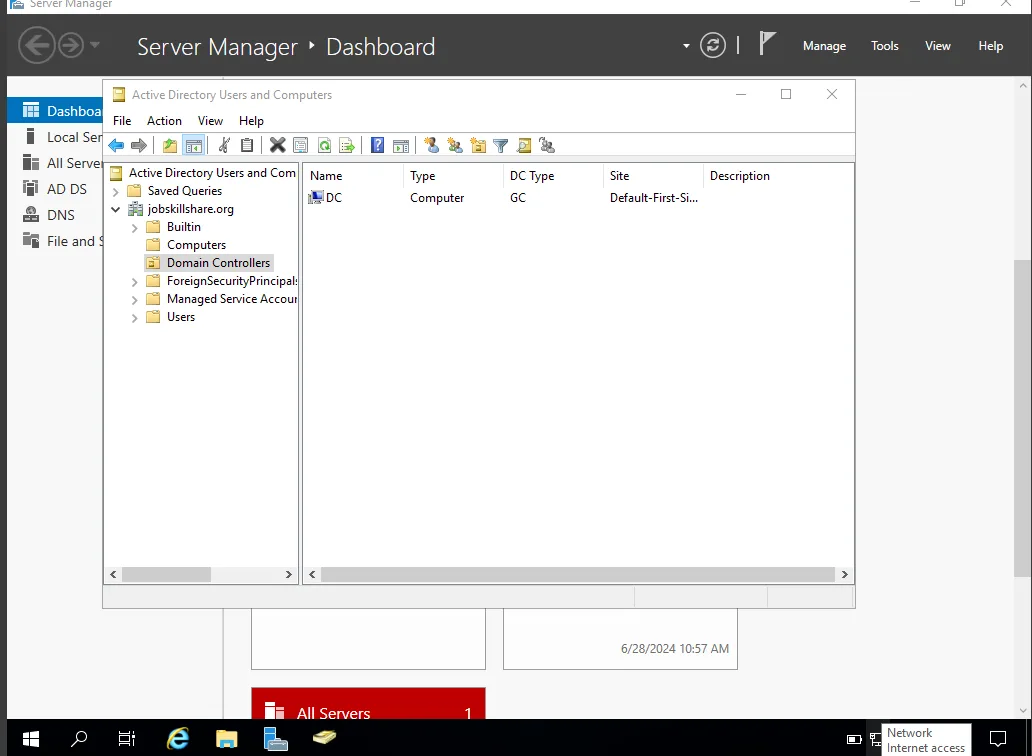
- Verify that Helpdesk is now a part of the domain.
What are the system requirements for running VirtualBox?
You need at least 8GB of RAM and sufficient CPU cores to run multiple virtual machines efficiently.
Why use a bridged adapter instead of NAT?
A bridged adapter allows your VM to communicate with other devices on the network, making it act like a real machine on the same network.
How do I troubleshoot network connectivity issues between my virtual machines?
Check your VirtualBox network settings, ensure the correct adapter is selected, and confirm the DNS settings point to the domain controller.
Can I use a different version of Windows Server?
Yes, but the steps may vary slightly. It is recommended to use an evaluation version for learning purposes.
How can I back up my virtual machines?
You can create snapshots in VirtualBox or export the VM to an OVA file for backup and migration purposes.
