The transition from IPv4 to IPv6 represents one of the most significant upgrades in networking history. This shift isn’t just about having more addresses; it completely transforms how we think about network design, address management, and security. This article explores IPv6 addressing structures, subnetting strategies, and automation techniques that make IPv6 networks both powerful and manageable.
Let’s get started
IPv6 Address Fundamentals
Unlike IPv4 devices that have only a single address, IPv6-enabled devices typically maintain multiple addresses simultaneously, with at least two unicast addresses being standard:
Global Unicast Address (GUA)
The Global Unicast Address functions similarly to a public IPv4 address. Think of it as your home address that anyone worldwide can use to send you mail. Every GUA is globally unique and routable across the internet.
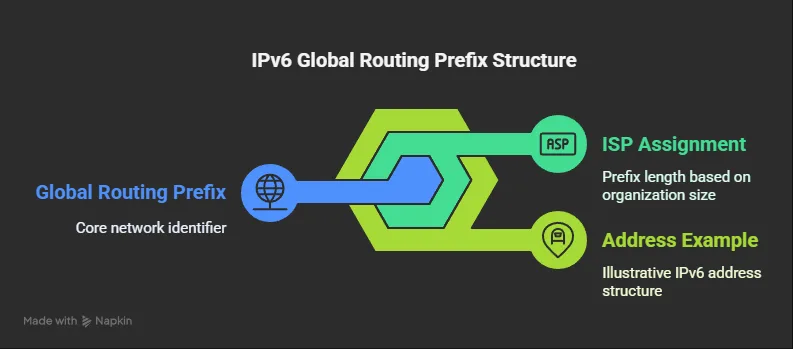
An IPv6 address consists of 128 bits (four times longer than IPv4) and is typically written in eight groups of four hexadecimal digits separated by colons (e.g., 2001:db8:1234:5678:abcd:ef12:3456:7890).
IPv6 addresses break down into three primary components:
- Global Routing Prefix: Identifies the network (analogous to a street name)
- Subnet ID: Divides the network into smaller segments (like an apartment building number)
- Interface ID: Identifies the specific device (similar to an apartment number)
Global Routing Prefix Explained
The Global Routing Prefix represents the portion of the address assigned by Internet Service Providers (ISPs) to identify specific networks. In the IPv6 addressing hierarchy, this functions like the street name in a physical address, directing traffic toward your network’s location.
For example, if your IPv6 address is 2001:db8:1234:5678::1, the Global Routing Prefix might be 2001:db8:1234::/48. This prefix uniquely identifies your organization’s network on the global internet.
ISPs typically assign different prefix lengths based on customer size:
- Large enterprises might receive a /32 or /36 prefix
- Medium organizations often receive a /48 prefix
- Small offices or homes might receive a /56 prefix
- Individual network segments commonly use /64 prefixes
Subnet ID Explained
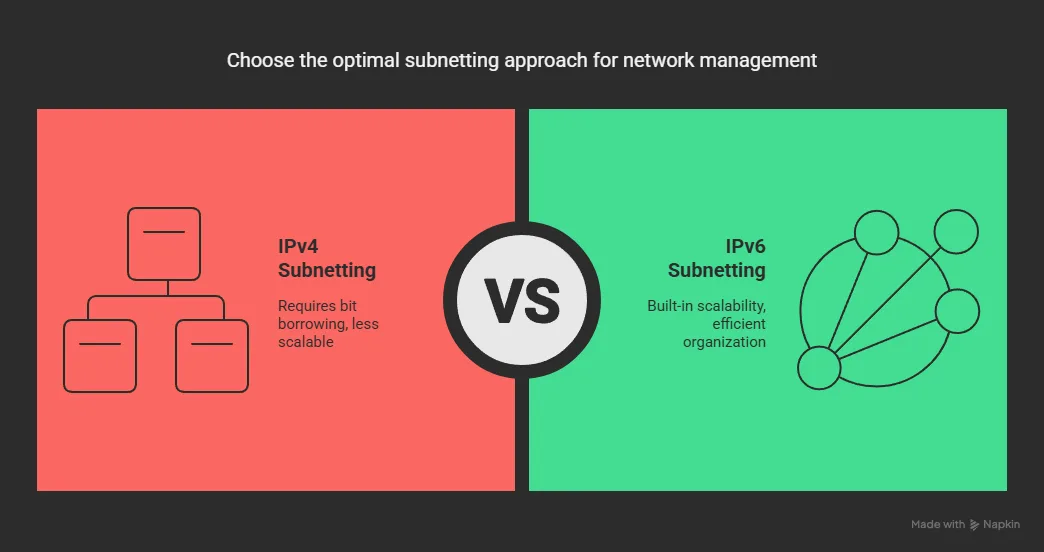
The Subnet ID serves to divide larger networks into more manageable subnetworks. Unlike IPv4, where subnetting requires “borrowing” bits from the host portion, IPv6 was architected with subnetting as a foundational concept.
In our physical address analogy, if the Global Routing Prefix represents the street name, the Subnet ID works like the building number, organizing devices into logical groups within the larger network.
The Subnet ID occupies the space between the Global Routing Prefix and the Interface ID. A common configuration involves organizations receiving a /48 prefix and creating multiple /64 subnets within that allocation.
For example, if a company receives the IPv6 block 2001:db8:1234::/48, they might create different subnets for various departments:
- 2001:db8:1234:0001::/64 for IT Department
- 2001:db8:1234:0002::/64 for Sales Department
- 2001:db8:1234:0003::/64 for HR Department
- 2001:db8:1234:0004::/64 for Finance Department
- 2001:db8:1234:0005::/64 for Executive Offices
- 2001:db8:1234:0006::/64 for Conference Rooms
- 2001:db8:1234:0007::/64 for Guest Network
Interface ID Explained
The Interface ID identifies individual devices within a subnet. Following our addressing analogy, if the Subnet ID represents a building number, the Interface ID functions as the specific apartment number where someone lives.
The Interface ID is equivalent to the host portion of an IPv4 address. We use the term “Interface ID” because a single host may have multiple network interfaces, each requiring its own address. The networking community strongly recommends using /64 subnets in most scenarios, which creates a 64-bit Interface ID space. This provides approximately 18.4 quintillion (2^64) possible device addresses per subnet—an almost incomprehensibly large number.
Interface IDs can be generated through several methods:
- EUI-64 Method: Automatically derived from the device’s MAC address
- Random Generation: Created randomly for enhanced privacy
- Manual Assignment: Configured by network administrators
- Sequential Numbering: Simple incremental addresses (like ::1, ::2, ::3)
For example, if a device in the IT subnet has the IPv6 address: 2001:db8:1234:0001:abcd:ef12:3456:7890
The bolded portion represents the Interface ID that uniquely identifies this device within its subnet.
Link-Local Address (LLA)
Link-Local Addresses represent another essential aspect of IPv6 addressing that has no direct equivalent in IPv4. Every IPv6-enabled interface must have an LLA, which serves critical functions in local network operations.
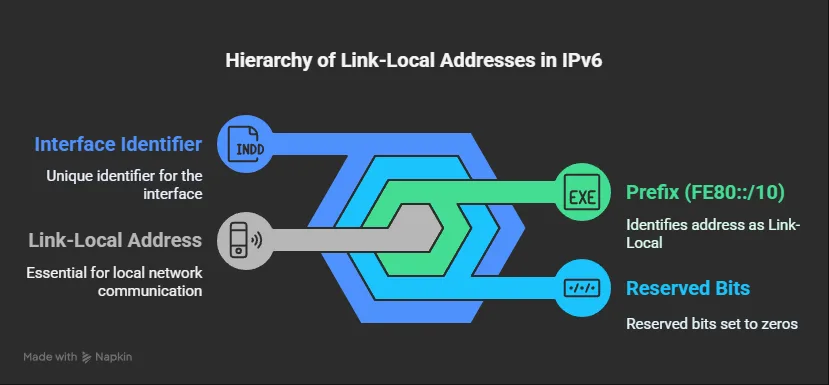
Think of LLAs as walkie-talkies that only work within a limited range—devices on the same network segment (same VLAN or physical network) can communicate using LLAs without requiring a router. These addresses begin with the prefix FE80::/10 and are automatically configured on all IPv6 interfaces.
The LLA address format follows this structure: FE80::/10 + zeros + Interface Identifier
For example: FE80:0000:0000:0000:abcd:ef12:3456:7890 (Often abbreviated as FE80::abcd:ef12:3456:7890)
The address components break down as:
- First 10 bits (FE80::/10): Identifies the address as a Link-Local Address
- Next 54 bits: Reserved and set to zeros
- Last 64 bits: Interface ID (derived from MAC address or generated randomly)
IPv4 vs. IPv6 Subnetting: The Fundamental Difference
To fully appreciate IPv6 subnetting, it helps to understand how dramatically different it is from IPv4 approaches.
IPv4 Subnetting (The Borrowing Bits Approach)
IPv4 addresses are 32 bits long. Originally, IPv4 used fixed classes (A, B, C), but address exhaustion quickly became a problem. To create subnets, network administrators must “borrow” bits from the host portion to divide a network into smaller segments.
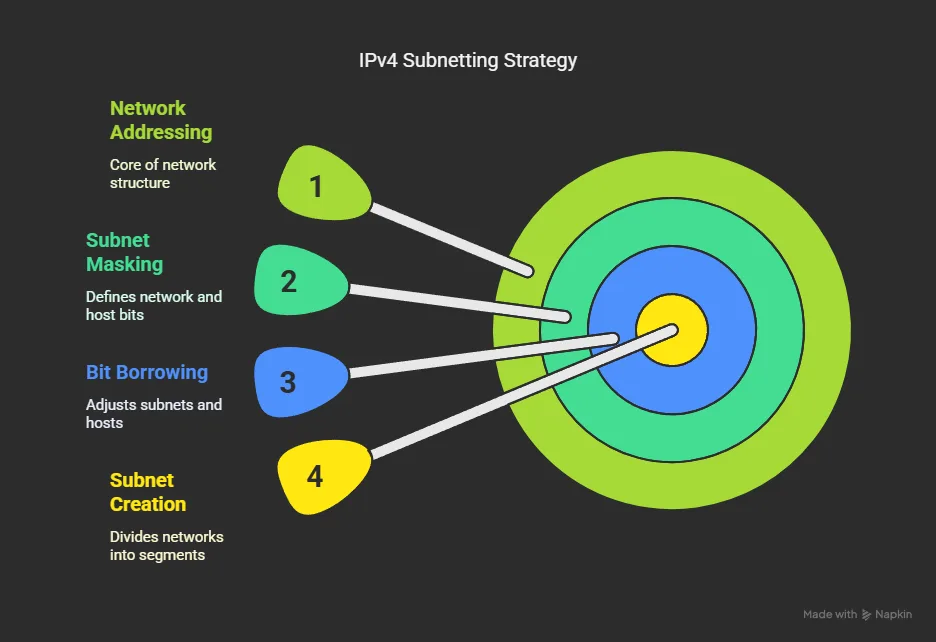
For example, with a Class C network (255.255.255.0 or /24), you start with 254 usable host addresses. If you need more subnets, you borrow bits from the host portion. Borrowing 2 bits results in a /26 subnet mask (255.255.255.192), creating 4 subnets but reducing each subnet to 62 usable host addresses. This constant tradeoff between subnet count and host capacity represents a fundamental limitation of IPv4.
IPv6 Subnetting (Built for Scale)
IPv6 addresses span 128 bits—a space so vast that subnetting was incorporated into the basic design. There’s no need to “borrow” bits from the host portion because the address space accommodates extensive subnet hierarchies by default.
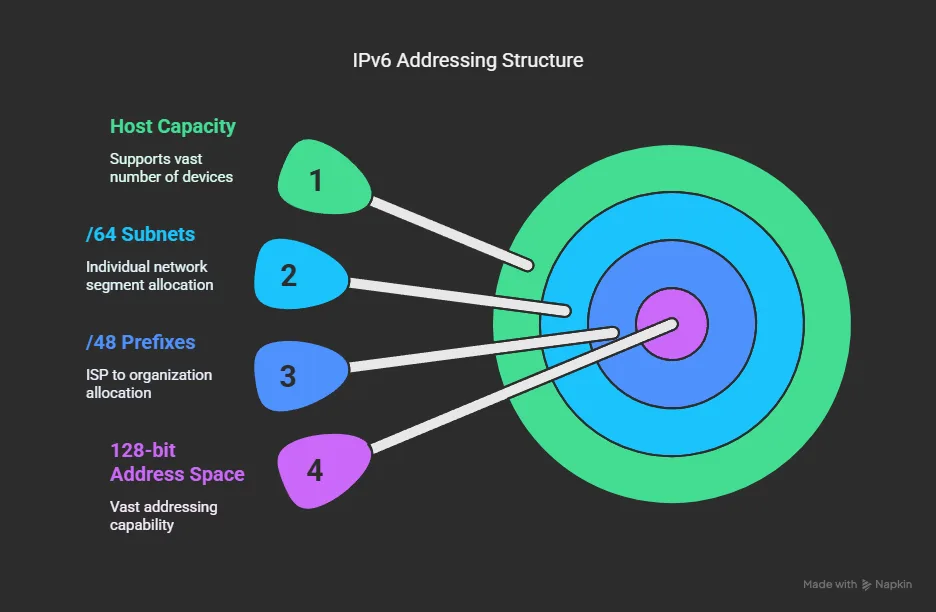
In standard IPv6 deployments:
- ISPs assign /48 prefixes to organizations
- Organizations create /64 subnets for individual network segments
- Each /64 subnet supports approximately 18.4 quintillion hosts
This structure eliminates the painful “subnet vs. host” tradeoff that characterizes IPv4 network planning.
Variable Length Subnet Masking (VLSM) in IPv6
While IPv6 provides enormous address space, efficient use of addresses through Variable Length Subnet Masking (VLSM) remains important for network organization and security.
VLSM Concepts in IPv6
VLSM in IPv6 follows similar principles to IPv4 but operates on a much larger scale. It allows network administrators to create subnets of different sizes based on actual needs, rather than forcing all subnets to be the same size.
While the standard recommendation is to use /64 subnets for most networks, VLSM in IPv6 might involve creating:
- /64 subnets for normal network segments
- /112 or /120 subnets for point-to-point links
- /126 subnets for special-purpose connections
- /128 for loopback addresses
VLSM Implementation in IPv6
Let’s explore how to implement VLSM in IPv6 with a practical example. Imagine your organization has been allocated the 2001:db8:abcd::/48 prefix, and you need to create subnets of various sizes.
Step 1: Inventory Network Requirements
First, list your subnet requirements by size:
- Data Center: Needs 100 subnets with full /64 addressing
- Branch Offices: 15 locations requiring 10 subnets each (/64)
- Point-to-point links: 50 connections needing minimal addresses (/126)
Step 2: Allocate Address Blocks
Assign portions of your address space to each requirement:
- Data Center: 2001:db8:abcd:0000::/56 (provides 256 /64 subnets)
- Branch Offices: 2001:db8:abcd:0100::/56 through 2001:db8:abcd:0f00::/56
- Point-to-point links: 2001:db8:abcd:ff00::/64 (subdivided into /126 subnets)
Step 3: Create Subnet Plan
For the Data Center range (2001:db8:abcd:0000::/56):
- 2001:db8:abcd:0000::/64 (First Data Center subnet)
- 2001:db8:abcd:0001::/64 (Second Data Center subnet)
- …and so on up to 2001:db8:abcd:00ff::/64
For Branch Office 1 (2001:db8:abcd:0100::/56):
- 2001:db8:abcd:0100::/64 (Branch 1, subnet 1)
- 2001:db8:abcd:0101::/64 (Branch 1, subnet 2)
- …up to 2001:db8:abcd:010f::/64
For point-to-point links (2001:db8:abcd:ff00::/64):
- 2001:db8:abcd:ff00::/126
- 2001:db8:abcd:ff00::4/126
- 2001:db8:abcd:ff00::8/126
- …and so on
Benefits of IPv6 VLSM
VLSM in IPv6 offers several advantages:
- Organization: Creates a structured, hierarchical addressing scheme
- Conservation: Though IPv6 addresses are abundant, good organization prevents waste
- Security: Allows for targeted security policies by subnet purpose
- Routing efficiency: Promotes route summarization for simpler routing tables
- Scalability: Facilitates network growth without complete redesigns
IPv6 Subnet Management Best Practices
Managing IPv6 subnets effectively requires planning and documentation. Here are key best practices:
Hexadecimal Numbering System
Understanding hexadecimal notation is crucial for IPv6 management. Hexadecimal uses 16 digits (0-9 and A-F) to represent values. Each hexadecimal digit corresponds to 4 bits, making it perfect for IPv6’s 128-bit structure.
For example, the hexadecimal value “2001” equals: 2 × 16³ + 0 × 16² + 0 × 16¹ + 1 × 16⁰ = 8192 + 0 + 0 + 1 = 8193 in decimal.
Subnet Allocation Strategies
Several strategies help manage IPv6 subnet allocation effectively:
1. Nibble Boundary Alignment
Creating subnets on nibble boundaries (multiples of 4 bits: /48, /52, /56, /60, /64) simplifies addressing because each nibble corresponds to one hexadecimal digit. This makes subnets more readable and easier to manage.
For example, a /56 prefix like 2001:db8:abcd:ef00::/56 is aligned on a nibble boundary, corresponding to a complete hexadecimal digit, making subnet calculations straightforward.
2. Logical Grouping by Function
Organize subnets based on network function or department. This approach enhances security and simplifies management:
- 2001:db8:abcd:1000::/52 – User workstations
- 2001:db8:abcd:2000::/52 – Servers and infrastructure
- 2001:db8:abcd:3000::/52 – IoT devices
- 2001:db8:abcd:4000::/52 – Guest networks
3. Geographic Organization
For multi-site organizations, allocate subnets based on geography:
- 2001:db8:abcd:01xx::/56 – North America locations
- 2001:db8:abcd:02xx::/56 – Europe locations
- 2001:db8:abcd:03xx::/56 – Asia Pacific locations
4. Growth Planning
Always allocate larger subnet spaces than immediately needed. The gap between currently used addresses and maximum allocation provides room for growth without requiring renumbering.
Subnet Documentation
Proper documentation is essential for IPv6 subnet management. Create and maintain:
- Address Plan Document: Detailed breakdown of prefix allocations
- Subnet Assignment Records: Documentation of which subnets are assigned to what purpose
- IPAM Database: Use IP Address Management tools to track address usage
- Visual Network Maps: Diagrams showing subnet organization
Automating IPv6 Address Management with DHCPv6
While IPv6 supports stateless address autoconfiguration (SLAAC), Dynamic Host Configuration Protocol version 6 (DHCPv6) provides more control and management capabilities.
DHCPv6 vs. SLAAC
IPv6 offers two primary methods for automatic address configuration:
Stateless Address Autoconfiguration (SLAAC)
SLAAC allows devices to generate their own IPv6 addresses without a centralized server. The process works as follows:
- The device creates a Link-Local Address (FE80::/10)
- It performs Duplicate Address Detection to ensure uniqueness
- The device receives Router Advertisements containing network prefixes
- It generates a Global Unicast Address by combining the prefix with its Interface ID
SLAAC is simple and doesn’t require additional servers, but it lacks centralized management.
DHCPv6
DHCPv6 provides centralized address management similar to DHCP for IPv4, but with enhanced capabilities. DHCPv6 can operate in several modes:
- Stateful DHCPv6: The server manages and assigns all addressing information
- Stateless DHCPv6: SLAAC provides addresses while DHCPv6 provides additional configuration parameters
- DHCPv6 Prefix Delegation: Assigns entire subnets to customer devices like home routers
Implementing DHCPv6
A basic DHCPv6 implementation involves:
Server Configuration
On most DHCPv6 servers, you’ll configure:
- Address Pools: Ranges of addresses available for assignment
- Prefix Length: Typically /64 for normal networks
- Lease Duration: How long devices can use assigned addresses
- DNS Settings: DNS server addresses provided to clients
- Domain Names: Search domains for DNS resolution
- Other Options: NTP servers, SIP servers, etc.
Here’s a simplified example of a DHCPv6 server configuration for the ISC DHCP server:
subnet6 2001:db8:abcd:1::/64 {
    range6 2001:db8:abcd:1::100 2001:db8:abcd:1::ffff;
    option dhcp6.name-servers 2001:db8:abcd:53::1, 2001:db8:abcd:53::2;
    option dhcp6.domain-search "example.com";
    option dhcp6.sntp-servers 2001:db8:abcd:123::1;
    preference 255;
    default-lease-time 86400;
    max-lease-time 172800;
}
Client Configuration
Most client devices are configured to use DHCPv6 by default or with minimal configuration. On network equipment, you might enable DHCPv6 with commands like:
For Cisco IOS:
interface GigabitEthernet0/0
 ipv6 address dhcp
 ipv6 dhcp client pd prefix-from-provider
For Linux systems:
auto eth0
iface eth0 inet6 dhcp
DHCPv6 Prefix Delegation
DHCPv6 Prefix Delegation (PD) represents one of the most powerful features for ISPs and large networks. It allows DHCPv6 servers to assign entire subnets to client devices, which can then further subdivide those prefixes.
This approach is particularly useful for:
- ISPs assigning prefix blocks to customer premises equipment
- Branch offices receiving subnet allocations from headquarters
- Network virtualization environments assigning subnets to virtual networks
The process works as follows:
- The requesting router (often called the Requesting Router or DHCPv6-PD client) contacts the DHCPv6 server
- The server assigns a prefix from its pool (such as a /56 or /60)
- The requesting router subdivides this prefix for its local networks
- The router advertises these subnets to connected devices
A DHCPv6-PD configuration might look like:
For the server (simplified ISC DHCP configuration):
subnet6 2001:db8::/32 {
    range6 2001:db8:0::/48 2001:db8:ffff::/48;
    prefix6 2001:db8:0::/48 2001:db8:ffff::/48 /56;
}
For the client (Cisco IOS example):
interface GigabitEthernet0/0
 ipv6 address dhcp
 ipv6 dhcp client pd PREFIX-FROM-ISP
!
interface GigabitEthernet0/1
 ipv6 address PREFIX-FROM-ISP::1:0:0:0:1/64
 ipv6 nd router-preference high
 ipv6 nd ra interval 30
IPv6 Addressing Security Considerations
IPv6 introduces new security challenges and opportunities that network administrators should understand.
Privacy Extensions
The traditional IPv6 addressing method using EUI-64 (based on MAC addresses) can potentially expose device identities across networks. To address this privacy concern, IPv6 includes Privacy Extensions (RFC 4941), which generate temporary, randomized Interface IDs.
Privacy Extensions work by:
- Creating a random Interface ID that changes periodically
- Using this ID for outbound connections
- Maintaining the original EUI-64 address for inbound connections
To enable Privacy Extensions:
On Windows:
netsh interface ipv6 set privacy state=enabled
On Linux:
sysctl -w net.ipv6.conf.all.use_tempaddr=2
Unique Local Addresses (ULA)
ULAs (prefix FC00::/7) serve a similar purpose to private IPv4 addresses (10.0.0.0/8, 172.16.0.0/12, 192.168.0.0/16). They provide addresses for internal networks that aren’t meant to be routed over the internet.
ULAs offer several advantages:
- They work without internet connectivity
- They don’t change if your ISP changes
- They provide a stable internal addressing scheme
Generate a ULA prefix using online tools or with this simplified approach:
- Use prefix FD00::/8 (a subset of FC00::/7 for local use)
- Generate a random 40-bit Global ID
- Append your Subnet ID and Interface ID
Example: FD01:DB8:1234::/48 might be a valid ULA prefix.
Secure Neighbor Discovery (SEND)
IPv6 relies on Neighbor Discovery Protocol (NDP) for functions like address resolution and router discovery. However, basic NDP lacks security controls, making it vulnerable to attacks.
Secure Neighbor Discovery (SEND) provides:
- Protection against address theft
- Authentication of router advertisements
- Verification of neighbor solicitations and advertisements
SEND uses cryptographic methods to validate NDP messages, though deployment remains limited due to implementation complexity.
Special IPv6 Addresses and Prefixes
Understanding special IPv6 addresses helps with network troubleshooting and design:
- ::/128 – Unspecified address (similar to 0.0.0.0 in IPv4)
- ::1/128 – Loopback address (similar to 127.0.0.1 in IPv4)
- FE80::/10 – Link-Local addresses
- FC00::/7 – Unique Local Addresses (ULA)
- FF00::/8 – Multicast addresses
- 2000::/3 – Global Unicast Addresses (currently allocated)
- 64:FF9B::/96 – IPv4/IPv6 translation (NAT64)
- 2001:DB8::/32 – Documentation prefix (used in examples)
- 2001::/32 – Teredo tunneling
- 2002::/16 – 6to4 tunneling
Real-World IPv6 Subnet Planning Example
Let’s walk through a comprehensive example of planning IPv6 addressing for a medium-sized organization with multiple locations.
Scenario
Company XYZ has:
- Headquarters with 500 employees
- 5 branch offices with 50-100 employees each
- A data center hosting 200 servers
- Various IoT deployments
- Remote access VPN services
They’ve received a 2001:db8:5555::/48 allocation from their ISP.
Step 1: High-Level Allocation
First, divide the /48 into functional blocks:
- 2001:db8:5555:0000::/52 – Headquarters networks
- 2001:db8:5555:1000::/52 – Branch office networks
- 2001:db8:5555:2000::/52 – Data center networks
- 2001:db8:5555:3000::/52 – IoT networks
- 2001:db8:5555:f000::/52 – VPN and remote access
- 2001:db8:5555:ff00::/56 – Network infrastructure and point-to-point links
Step 2: Headquarters Subnetting
Within the headquarters block, create functional subnets:
- 2001:db8:5555:0000::/64 – Management network
- 2001:db8:5555:0001::/64 – Executive department
- 2001:db8:5555:0002::/64 – Finance department
- 2001:db8:5555:0003::/64 – HR department
- 2001:db8:5555:0004::/64 – Marketing department
- 2001:db8:5555:0005::/64 – Sales department
- 2001:db8:5555:0006::/64 – Engineering department
- 2001:db8:5555:0007::/64 – IT department
- 2001:db8:5555:0008::/64 – Wireless network
- 2001:db8:5555:0009::/64 – Guest network
- 2001:db8:5555:000a::/64 through 2001:db8:5555:00ff::/64 – Reserved for future growth
Step 3: Branch Office Subnetting
Allocate a /56 to each branch office:
- 2001:db8:5555:1000::/56 – Branch Office 1
- 2001:db8:5555:1000::/64 – Management
- 2001:db8:5555:1001::/64 – Staff
- 2001:db8:5555:1002::/64 – Wireless
- 2001:db8:5555:1003::/64 – Guest
- 2001:db8:5555:1004::/64 through 2001:db8:5555:10ff::/64 – Future growth
- 2001:db8:5555:1100::/56 – Branch Office 2
- Similar structure to Branch Office 1
And so on for other branches.
Step 4: Data Center Subnetting
Organize data center subnets by function:
- 2001:db8:5555:2000::/64 – Data center management
- 2001:db8:5555:2001::/64 – Web servers (production)
- 2001:db8:5555:2002::/64 – Database servers (production)
- 2001:db8:5555:2003::/64 – Application servers (production)
- 2001:db8:5555:2004::/64 – Storage network
- 2001:db8:5555:2005::/64 – Backup network
- 2001:db8:5555:2006::/64 – Development environment
- 2001:db8:5555:2007::/64 – Test environment
- 2001:db8:5555:2008::/64 – QA environment
- 2001:db8:5555:2009::/64 through 2001:db8:5555:20ff::/64 – Future expansion
Step 5: Implement DHCPv6
Set up DHCPv6 servers for address management:
- Primary DHCPv6 server at headquarters
- Secondary DHCPv6 server in the data center
- Configure Prefix Delegation for branch offices
- Set up appropriate lease times and options
- Implement DHCPv6 high availability
Step 6: Documentation
Create comprehensive documentation including:
- Master address plan spreadsheet
- Network diagrams showing subnet allocations
- IPAM database entries
- Change management procedures
- Addressing policy document
IPv6 represents not just a larger address space but a fundamentally different approach to network design and management. By understanding the structure of IPv6 addresses, implementing effective subnetting strategies, and leveraging address automation tools like DHCPv6, network administrators can build networks that are more scalable, secure, and manageable than ever before.
The transition to IPv6 requires new knowledge and skills, but the benefits—nearly unlimited addressing, simplified address management, improved security, and enhanced network capabilities—far outweigh the initial learning curve. As global IPv4 exhaustion continues, mastering IPv6 becomes not just valuable but essential for networking professionals.
The most successful IPv6 implementations start with careful planning and clear documentation. By following the principles outlined in this article, you can design an IPv6 addressing scheme that will serve your organization’s needs not just today, but for decades to come.
Why do I need to learn IPv6 when IPv4 still works fine for me?
IPv4 addresses are nearly exhausted globally, with regional internet registries having few or no new addresses to allocate. While workarounds like Network Address Translation (NAT) have extended IPv4’s lifespan, they create networking complications and break the end-to-end principle of internet communication.
IPv6 solves these problems with an enormous address space (340 undecillion addresses) that eliminates the need for NAT in most cases. Beyond addressing, IPv6 offers improved security features, more efficient routing, and better support for modern network applications. As more organizations and service providers deploy IPv6, familiarity with it becomes essential for networking professionals to ensure seamless connectivity across the entire internet.
How do I remember and work with those long IPv6 addresses?
Working with IPv6 addresses becomes simpler with these practical approaches:
First, use IPv6’s shorthand notation rules. You can omit leading zeros within each segment (2001:0db8: becomes 2001:db8:) and replace one continuous string of zero segments with a double colon (2001:db8:0:0:0:0:0:1 becomes 2001:db8::1).
Second, plan your network with memorable patterns. Use subnet IDs that follow logical numbering schemes based on function, location, or department. For example, all marketing department subnets might use a consistent pattern like 2001:db8:abcd:1xxx::/64.
Third, leverage DNS extensively. Just as you rarely type IPv4 addresses directly, configure DNS records for your IPv6 devices so you can use names instead of addresses.
Finally, utilize address management tools (IPAM) to track and organize your IPv6 addresses rather than trying to memorize them.
What’s the difference between DHCPv6 and SLAAC, and which should I use?
Stateless Address Autoconfiguration (SLAAC) and DHCPv6 represent two approaches to automatic IPv6 address assignment, each with distinct characteristics.
SLAAC allows devices to configure themselves without a central server. Devices create their own addresses by combining router-advertised prefixes with self-generated interface IDs. SLAAC is simple to deploy as it requires no additional servers, but offers limited central management capabilities.
DHCPv6 functions similarly to IPv4’s DHCP, with a central server assigning addresses and configuration parameters. It provides greater control, detailed logging, and the ability to assign specific addresses to specific devices. However, it requires deploying and maintaining DHCPv6 servers.
Many organizations use a hybrid approach: SLAAC for basic connectivity and Stateless DHCPv6 for additional parameters like DNS servers.
The best choice depends on your management requirements:
Use SLAAC when simplicity and automatic operation are priorities, such as for small networks or guest networks.
Use DHCPv6 when you need detailed address tracking, specific address assignments, or centralized management, particularly in enterprise environments.
How do I plan subnets in IPv6 without running out of addresses?
Unlike IPv4 where careful conservation of addresses is necessary, IPv6 subnet planning focuses on organization and future scalability rather than address conservation.
Start by using nibble boundaries (multiples of 4 bits like /48, /52, /56, /60, /64) for your subnet divisions. This makes subnets correspond to complete hexadecimal digits, simplifying management.
Create a hierarchical addressing plan where blocks of addresses are reserved for specific functions, locations, or departments. For example, allocate 2001:db8:abcd:1000::/52 for headquarters, 2001:db8:abcd:2000::/52 for branch offices, and so on.
Document your subnet allocations thoroughly. Despite the vast address space, good documentation remains essential for effective management.
Remember that in IPv6, the goal isn’t address conservation but logical organization that simplifies management and provides room for growth.
What security considerations are unique to IPv6 networks?
IPv6 introduces several security considerations that differ from IPv4:
First, the expanded address space makes traditional network scanning techniques impractical. While this provides some security through obscurity, it also makes network monitoring more challenging. Deploy effective monitoring tools designed specifically for IPv6.
Second, IPv6’s mandatory Link-Local Addresses create a persistent communication path that exists even without global addressing. Secure your layer 2 networks carefully, as Link-Local communication can potentially bypass security controls focused only on global addresses.
Third, transition mechanisms like dual-stack environments, tunnels, and translation technologies can create security gaps if not properly secured. Ensure security policies apply consistently across both IPv4 and IPv6 traffic.
Fourth, Neighbor Discovery Protocol (NDP) in IPv6 replaces ARP from IPv4 but has similar security vulnerabilities. Implement RA Guard and SEND (Secure Neighbor Discovery) where possible to prevent spoofing and redirection attacks.
Finally, client Privacy Extensions randomize interface identifiers to prevent tracking across networks. Consider enabling these to enhance user privacy, particularly on networks where devices connect to external services.
While IPv6 includes some security improvements over IPv4, it also introduces new considerations that require specific attention during deployment.
