Creating a personal portfolio website is an excellent way to showcase your skills, projects, and experience. In this tutorial, we will build a simple yet professional portfolio website using HTML. This is the first part of our project, focusing on structuring the webpage using semantic HTML elements. In future articles, we will enhance it with CSS for styling and JavaScript for interactivity.
By the end of this tutorial, you will have a basic portfolio website with sections such as “About Me,” “Projects,” and “Contact Me.”
Prerequisites
To follow along, you should have:
- A basic understanding of HTML
- A text editor like VS Code, Sublime Text, or Notepad++
- A web browser to preview your work
Step 1: Setting Up the HTML Structure
We will begin by creating the basic structure of our HTML document.
1. Create an HTML File
Open your text editor and create a new file named index.html. This will be our main webpage.
2. Define the Basic HTML Structure
Every HTML file starts with a DOCTYPE declaration, followed by an <html> element that contains the <head> and <body> sections. Add the following code to your index.html file:
<!DOCTYPE html>
<html lang="en">
<head>
  <meta charset="UTF-8">
  <meta name="viewport" content="width=device-width, initial-scale=1.0">
  <title>John Doe Portfolio</title>
  <!-- Favicon -->
  <link rel="icon" type="image/x-icon" href="favicon.ico">
</head>
<body>
</body>
</html>
This code:
- Declares the document type (
DOCTYPE html) - Defines the HTML structure (
<html>element withlang="en"for English) - Specifies character encoding (
UTF-8) and viewport settings for responsiveness - Sets the page title (
<title>John Doe Portfolio</title>) that appears in the browser tab - Links a favicon for branding
Step 2: Adding the Header Section
The header will contain the portfolio title and navigation links.
Add a <header> Element
Insert the following code inside the <body> section:
<header>
  <h1 id="main-title" class="portfolio-title">John Doe's Portfolio</h1>
  <nav>
    <ul id="nav-list">
      <li><a href="#about">About Me</a></li>
      <li><a href="#projects">Projects</a></li>
      <li><a href="#contact">Contact</a></li>
    </ul>
  </nav>
</header>
This code:
- Uses
<header>to group the portfolio title and navigation menu - Wraps the navigation links inside a
<nav>element - Uses an unordered list (
<ul>) with<li>items for navigation links
Step 3: Creating the About Me Section
The “About Me” section introduces the portfolio owner.
Add a <section> for About Me
Insert this code after the <header>:
<section id="about">
  <h1>About Me</h1>
  <p>Hello, my name is <strong>John Doe</strong> and I'm a <em>web developer</em> with a passion for crafting innovative digital experiences.</p>
  <div class="about-container" id="bio">
    <img src="profile.jpg" alt="Profile picture of John Doe">
    <p>I have over 5 years of experience in building responsive and engaging websites. <br> Feel free to browse through my projects!</p>
    <span>Learn more about my skills and expertise.</span>
  </div>
</section>
This code:
- Uses
<section>withid="about"for the About Me section - Uses
<p>for a description with<strong>(bold) and<em>(italicized) text - Includes an image (
<img>) with analtattribute for accessibility - Uses a
<div>to group additional information
Step 4: Adding the Projects Section
The projects section showcases the portfolio owner’s work.
Add a <section> for Projects
Insert the following code after the About Me section:
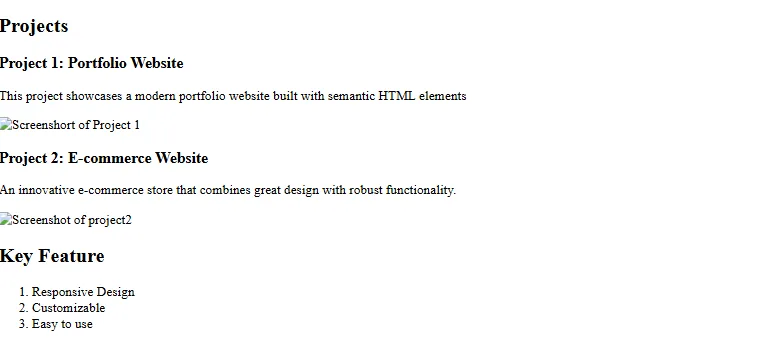
<section id="projects">
  <h1>Projects</h1>
  <article class="project">
    <h1>Project 1: Portfolio Website</h1>
    <p>This project showcases a modern portfolio website built with semantic HTML elements. It features a clean layout and intuitive navigation.</p>
    <img src="project1.jpg" alt="Screenshot of Project 1">
  </article>

  <article class="project">
    <h1>Project 2: E-commerce Store</h1>
    <p>An innovative e-commerce store that combines great design with robust functionality.</p>
    <img src="project2.jpg" alt="Screenshot of Project 2">
  </article>

  <h2>Key Features</h2>
  <ol>
    <li>Responsive Design</li>
    <li>User-Friendly Interface</li>
    <li>Fast Performance</li>
  </ol>
</section>
This code:
- Uses
<article>elements for each project - Includes
<h1>for project titles and<p>for descriptions - Uses an ordered list (
<ol>) to highlight key features
Step 5: Creating the Contact Section
This section provides contact details and social media links.
Add a <section> for Contact
Insert this code after the Projects section:
<section id="contact">
  <h1>Contact Me</h1>
  <p>If you'd like to connect, send me an email at <a href="mailto:john.doe@example.com">john.doe@example.com</a>.</p>
  <div class="contact-container">
    <p>Follow me on social media:</p>
    <ul>
      <li><a href="https://www.linkedin.com/in/johndoe" target="_blank">LinkedIn</a></li>
      <li><a href="https://twitter.com/johndoe" target="_blank">Twitter</a></li>
      <li><a href="https://github.com/johndoe" target="_blank">GitHub</a></li>
    </ul>
  </div>
</section>
This code:
- Provides an email link for contact
- Uses a
<div>to list social media profiles
Step 6: Adding a Footer
Finally, we add a footer to close the webpage.
<footer>
  <p>© 2025 John Doe. All rights reserved.<br>
  Designed with love using HTML.<br>
  <span class="footer-note">This portfolio showcases semantic HTML and various HTML elements.</span></p>
</footer>
Overall Code
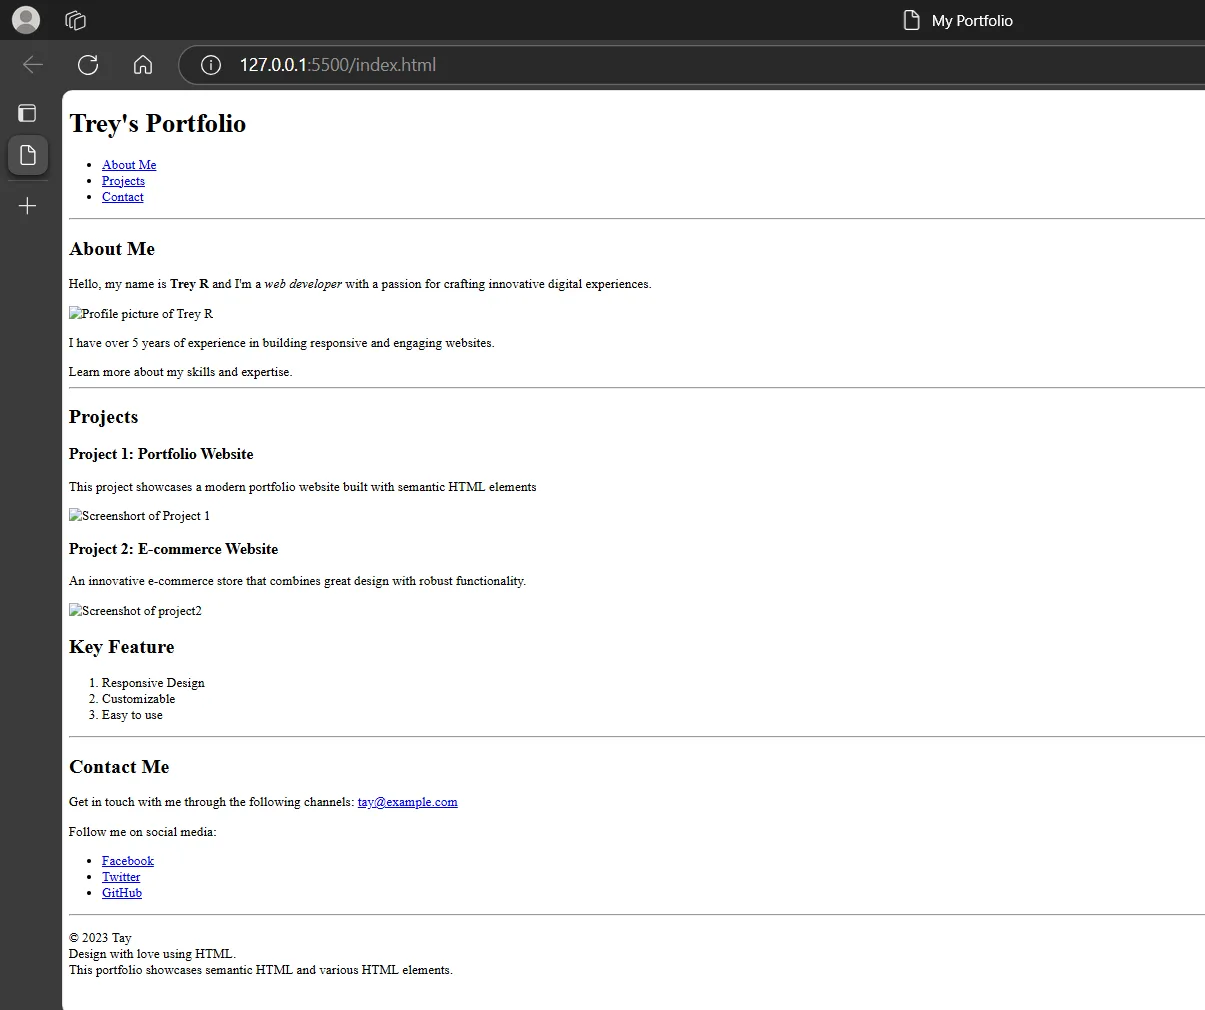
Below is an example of a portfolio webpage in HTML that incorporates all of your requested elements. You can save the following code in a file (for example, index.html) and open it in your browser:
<!DOCTYPE html>
<html lang="en">
<head>
  <meta charset="UTF-8">
  <meta name="viewport" content="width=device-width, initial-scale=1.0">
  <title>John Doe Portfolio</title>
  <!-- Favicon -->
  <link rel="icon" type="image/x-icon" href="favicon.ico">
</head>
<body>
  <!-- Header with title and navigation -->
  <header>
    <h1 id="main-title" class="portfolio-title">John Doe's Portfolio</h1>
    <nav>
      <ul id="nav-list">
        <li><a href="#about">About Me</a></li>
        <li><a href="#projects">Projects</a></li>
        <li><a href="#contact">Contact</a></li>
      </ul>
    </nav>
  </header>

  <hr>

  <!-- Main content area -->
  <main>
    <!-- About Me Section -->
    <section id="about">
      <h1>About Me</h1>
      <p>Hello, my name is <strong>John Doe</strong> and I'm a <em>web developer</em> with a passion for crafting innovative digital experiences.</p>
      <!-- Container with additional elements -->
      <div class="about-container" id="bio">
        <img src="profile.jpg" alt="Profile picture of John Doe">
        <p>I have over 5 years of experience in building responsive and engaging websites. <br> Feel free to browse through my projects!</p>
        <span>Learn more about my skills and expertise.</span>
      </div>
    </section>

    <hr>

    <!-- Projects Section -->
    <section id="projects">
      <h1>Projects</h1>
      <!-- First Project as an article -->
      <article class="project">
        <h1>Project 1: Portfolio Website</h1>
        <p>This project showcases a modern portfolio website built with semantic HTML elements. It features a clean layout and intuitive navigation.</p>
        <img src="project1.jpg" alt="Screenshot of Project 1">
      </article>

      <!-- Second Project as an article -->
      <article class="project">
        <h1>Project 2: E-commerce Store</h1>
        <p>An innovative e-commerce store that combines great design with robust functionality.</p>
        <img src="project2.jpg" alt="Screenshot of Project 2">
      </article>

      <!-- Ordered list of project features -->
      <h2>Key Features</h2>
      <ol>
        <li>Responsive Design</li>
        <li>User-Friendly Interface</li>
        <li>Fast Performance</li>
      </ol>
    </section>

    <hr>

    <!-- Contact Section -->
    <section id="contact">
      <h1>Contact Me</h1>
      <p>If you'd like to connect, send me an email at <a href="mailto:john.doe@example.com">john.doe@example.com</a>.</p>
      <!-- Container for social links -->
      <div class="contact-container">
        <p>Follow me on social media:</p>
        <!-- Unordered list of social media links -->
        <ul>
          <li><a href="https://www.linkedin.com/in/johndoe" target="_blank">LinkedIn</a></li>
          <li><a href="https://twitter.com/johndoe" target="_blank">Twitter</a></li>
          <li><a href="https://github.com/johndoe" target="_blank">GitHub</a></li>
        </ul>
      </div>
    </section>
  </main>

  <hr>

  <!-- Footer -->
  <footer>
    <p>© 2025 John Doe. All rights reserved.<br>
    Designed with love using HTML.<br>
    <span class="footer-note">This portfolio showcases semantic HTML and various HTML elements.</span></p>
  </footer>
</body>
</html>

We have successfully created the basic structure of a portfolio website using HTML. In the next part of this series, we will enhance the website’s appearance using CSS for styling. Stay tuned!
What is HTML and why is it important?
HTML (HyperText Markup Language) is the standard language used to create and structure web pages. It provides the basic framework for a webpage, allowing elements like text, images, links, and forms to be displayed in a browser.
What are semantic HTML elements, and why should you use them?
Semantic HTML elements clearly define the meaning of the content in a document. Examples include <header>, <article>, <section>, and <footer>. Using semantic elements improves accessibility, SEO, and maintainability of the code.
What is the difference between <div> and <span> elements?
<div> is a block-level element used to group larger sections of content together.<span> is an inline element used to apply styles or scripts to a small part of a text within a larger element.
What is the difference between absolute, relative, and fixed URLs in HTML?
Absolute URL: Includes the full address of a resource (e.g., https://example.com/image.jpg).
Relative URL: Refers to a file within the same domain (e.g., images/photo.jpg).
Fixed URL: Not a standard term, but “fixed” URLs generally refer to absolute URLs that do not change dynamically.
What is the difference between <strong> and <b>?
<strong> indicates importance and improves accessibility (screen readers emphasize it).<b> makes text bold but does not convey any additional importance.
What is the difference between <em> and <i>?
<em> is used to emphasize text, which means it has semantic meaning.<i> is used to italicize text for stylistic purposes, without implying emphasis.
What is the difference between id and class in HTML?
id is unique and used to identify a single element on a page (id="header").class can be applied to multiple elements (class="button").
What is the purpose of the alt attribute in an <img> tag?
The alt attribute provides alternative text for an image if it fails to load and improves accessibility for screen readers.

